


Moonlit Meadow | Girls Princess & Horse Wall Mural
Description
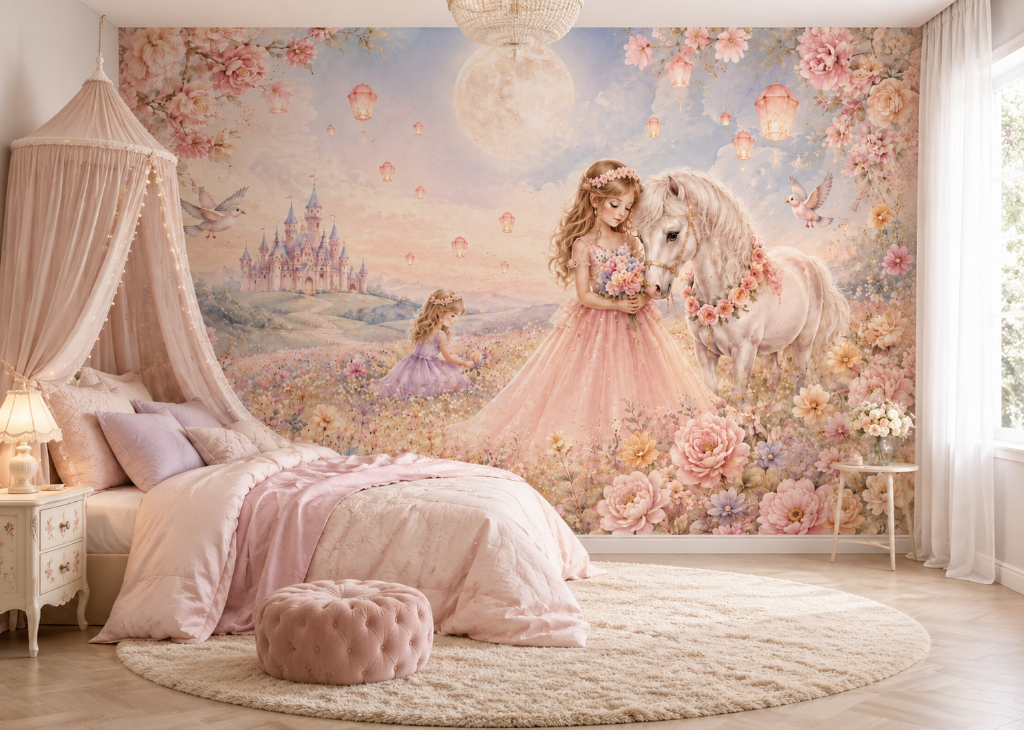
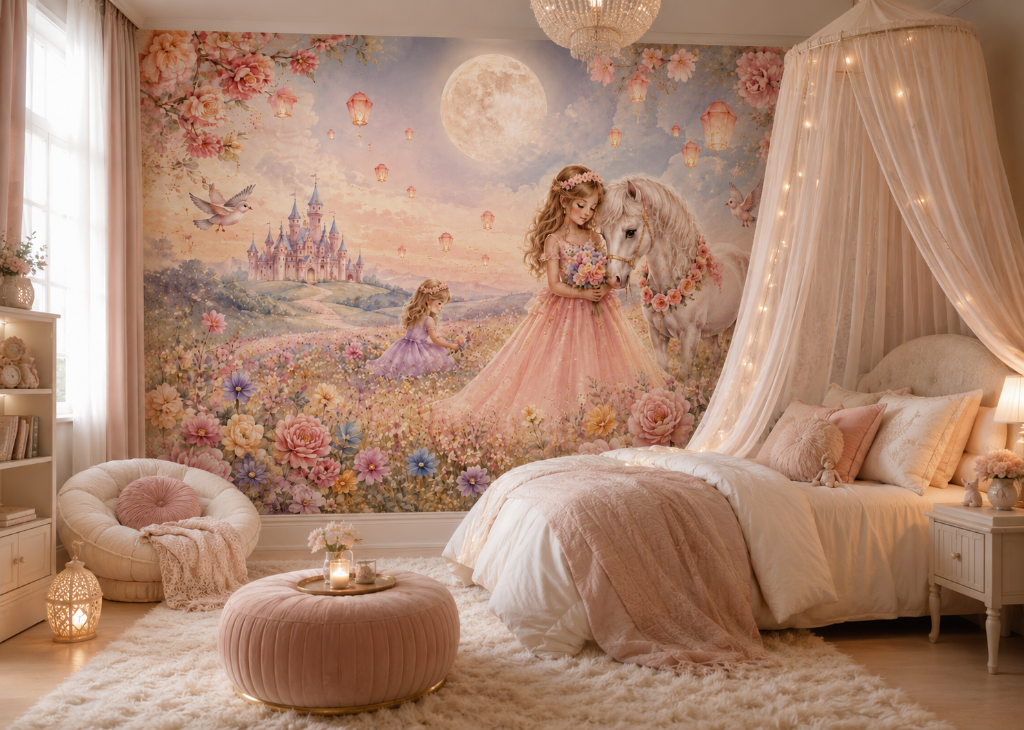
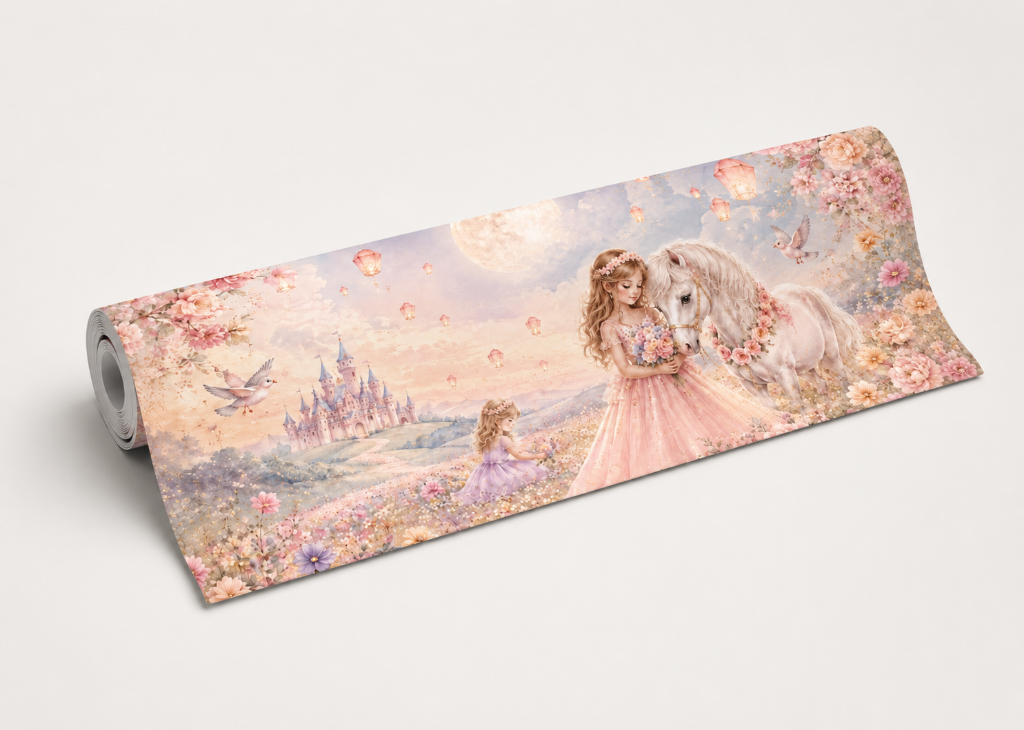
Moonlit Meadow - Girls Princess & Horse Wall Mural
Step into an utterly dreamlike fairy tale with this breathtakingly ethereal princess and horse mural. A luminous full moon glows magnificently at the heart of a warm blush and lavender sky, casting a soft golden light across a breathtaking wildflower meadow stretching all the way to a fairytale castle with tall blue-tipped spires nestled among the rolling hills in the distance. A graceful princess in a layered blush pink tulle ball gown with delicate floral details and a soft pink floral crown stands at the center of the scene, tenderly cradling a bouquet of soft pink, lavender, and blue flowers as she presses her cheek gently against the velvety nose of a magnificent white horse adorned with a cascading garland of blush pink roses and golden bridle. In the mid-ground, a small girl in a soft lavender dress with a floral crown kneels joyfully among the wildflowers, picking blooms in the golden light. Glowing rose-pink paper lanterns drift magically through the sky in every direction, while a pair of delicate white birds with blush-tipped wings fly gracefully through the scene. The entire composition is framed by overflowing branches of pale pink cherry blossom and enormous blush pink, soft peach, lavender, and golden dahlia blooms. Painted in an exquisitely luminous romantic watercolor style with the softest blush pink, warm peach, dusty lavender, champagne ivory, and pale gold - utterly magical, ethereal, and timelessly beautiful.
Custom-Made to Your Size
This mural is made to order. Provide your wall dimensions at checkout and we'll print it perfectly fitted to your wall.
- ✔ High-resolution, fade-resistant print
- ✔ Premium non-woven material
- ✔ Custom-fitted to your wall dimensions
Perfect for girls bedrooms, nurseries, and playrooms.
Installation Instructions
Wall Preparation
Ensure the wall is smooth, clean, and dry before you begin. Remove any nails, screws, or dust, and sand down rough surfaces as needed.
Mixing the Paste
Follow the instructions on your paste package and mix until you reach a smooth, lump-free consistency.
Checking the Panels
Lay out all panels on the floor before hanging. Verify that the pattern aligns correctly and inspect for any defects.
Applying the Paste
Using a roller or brush, apply a thin, even layer of paste directly onto the wall. Start from the top and work downward, covering a section slightly wider than each panel.
Hanging the Panels
Begin at the left side of the wall and work right. Align the first panel at the top and smooth it downward from the center outward to release air bubbles. Continue with each panel, aligning edges precisely without overlapping.
Trimming
Once all panels are in place, use a sharp knife to trim any excess material at the top, bottom, and sides.
Drying and Finishing
Allow the mural to dry for 24 hours. Do not touch or press on it during this time. Once dry, inspect for any lifting edges or air bubbles and smooth them out as needed.
How to Measure Your Wall
- Measure Width and Height
Use a measuring tape to measure the full width and height of the wall. Take measurements at multiple points to account for any irregularities. Add an extra 5 cm (2 inches) to both dimensions to allow for trimming and adjustments during installation. - Sloped Walls
For walls with sloped ceilings or floors, measure at the highest and widest points. Always capture the maximum dimensions to ensure full coverage. - Walls with Obstacles
Measure the entire wall as if doors, windows, and built-in furniture do not exist. You will cut around these during installation, so it is important to have enough material to work with. Add the standard extra margin at all edges. - Multiple Walls
Measure each wall separately, then combine the widths. Add 5 cm per wall to allow for proper alignment and trimming at each seam. - Irregular Shapes
Break the wall into smaller rectangular sections and measure each one individually. Add the extra margin to each section before combining totals. - Confirm Your Measurements
Double-check all measurements before placing your order. Consider sketching the wall with its dimensions to help visualize the layout and catch any errors.
This product is rated 5.0 of 5.0 stars.
It has received 530 reviews.